Showing posts with label focus. Show all posts

What was good for the front is good for the back - I'm talking LEDs!

 My last post was all about upgrading visibility up front in the headlights.  I figured, why not check out the back? 👀 But seriously, why have I waited 6 years to do this!?  Out back there are 4 lights per side.


**note these are polarity sensitive so double check them

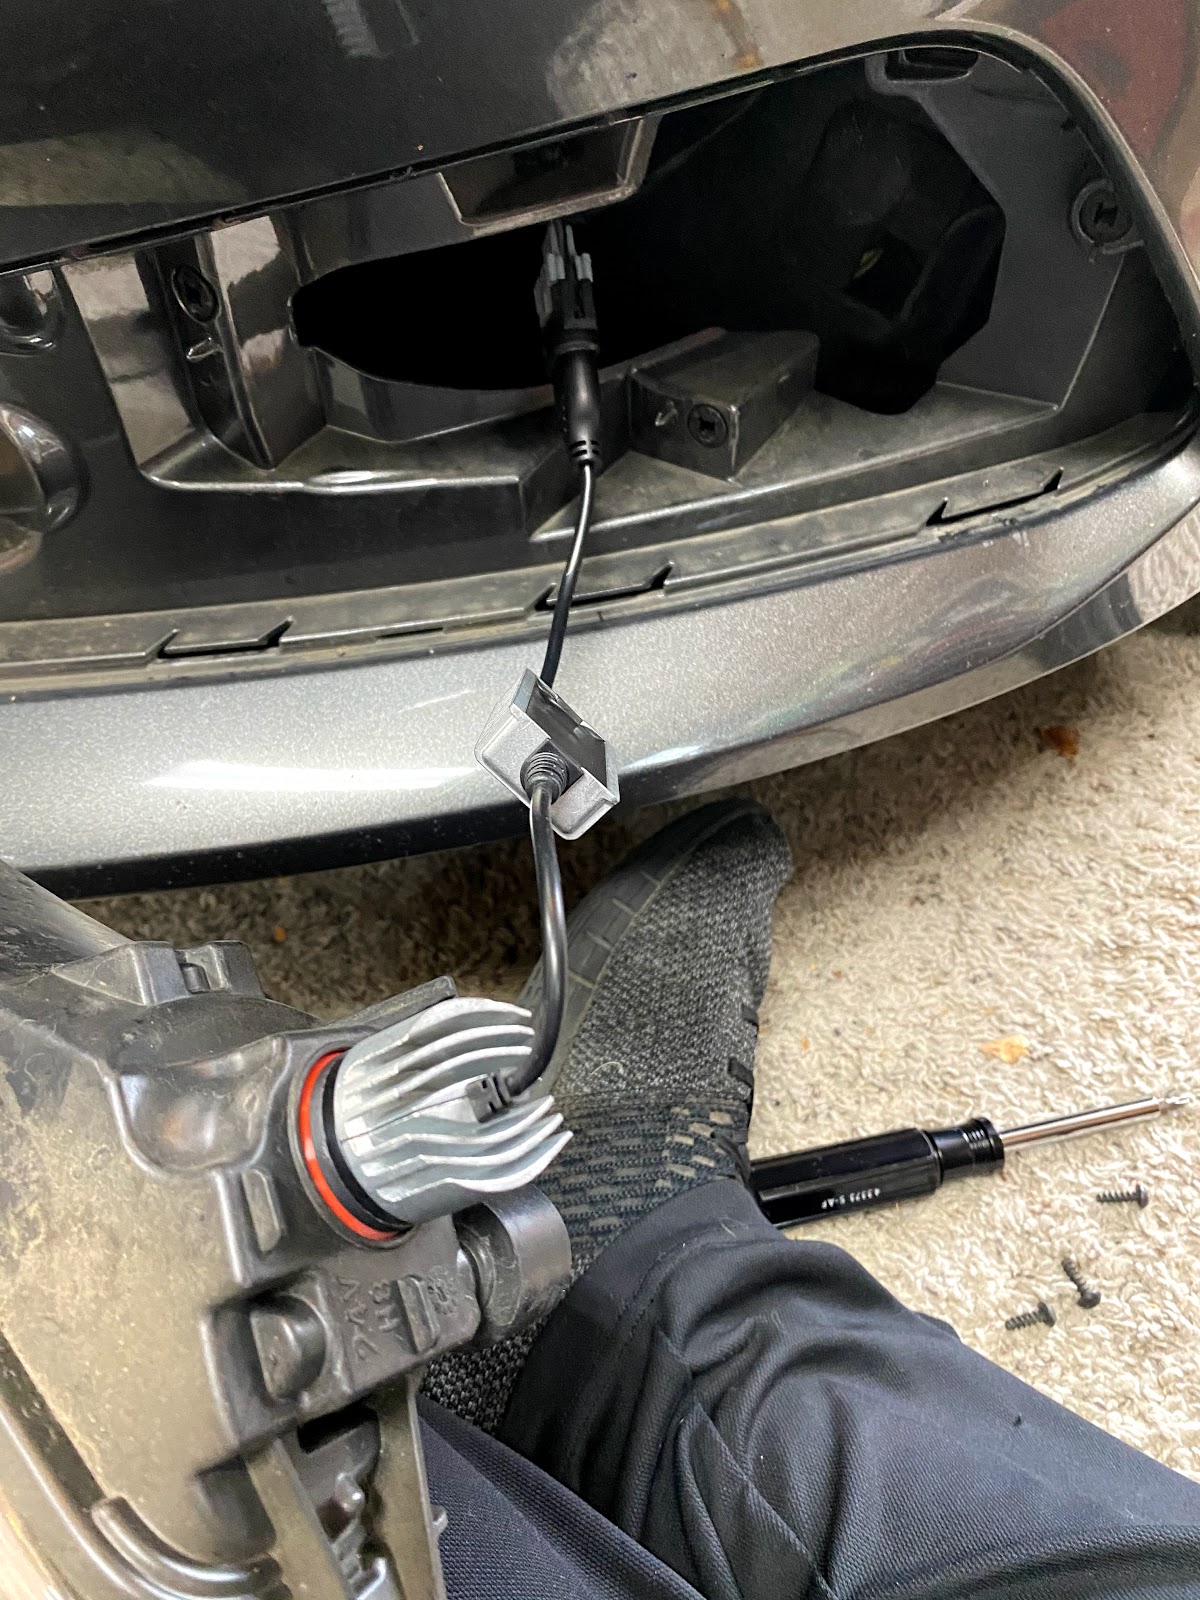
Getting the rear lenses out is really simple, pull out the lower carpet block, and untwist the plastic nut, there is also a 2nd one up and back from that one - amazing how 2 screwnuts hold this in place - there is another stabby part that is pressure fit toward the front of the light, just used a screwdriver to pop it out

if you haven't seen behind these lights, it's DIRTY back there! all the water drainage, leaves, etc. are in there - clean it out!


one simple plug in back, push the tab and it comes right out 👏

here's a comparison of the old bulbs vs the LEDs


needless to say, even in daylight you can see which side is the LED and which is OEM


LED reverse light left and OEM on right... it's a no brainer!!! Even in daytime!!


and here's everything done out back, not the brake lights are not on, just as running lights

needless to say - even in daylight, these new LEDs are PHENOMENAL!!
Two big thumbs up!!  👍👍

It's always a good time to change your cabin filter!

 After all the fires this past summer in NorCal, I decided to check the cabin air filters in our cars.  All I can say is O-M-G that's NASTY!  You can get a cheap $10 filter like the FD920 Cabin Air Filter for Ford Focus, or upgrade to a nice HEPA based one like the PureFlow HEPA Cabin Air Filter PC6174HX 

Whatever you do - just do it!  Look at our old filter compared to the new one! Seriously disgusting!


If you don't know how, it's a really simple process on the Focus family.  You just need one torx bit and everything else is pretty much hand driven.


WHAT A DIFFERENCE it made - honestly, I'm not sure how the A/C or heat worked previously with how clogged the old filter was.  Make sure you do it!!


Michelin Pilot Sport All Season 4 - great option for performance all-season tires!

 Our Michelin Pilot Sport 4s finally were at about 2/32nds and had to be retired at 32k of usage, so at least they met the warranty lifetime of 30k!  My wife is about to start a new job where there may be more 'weather' to deal with so we opted for the Michelin Pilot Sport All Season 4s to replace them with.  The tire is excellent, great ride quality and the grip is darn good!  


These tires have a 50% upgrade in warranty to 45K so that's a benefit as well for longevity.  Only 54K on our 2016 FoST and loving it!


Here's a review from Tire Rack on performance All-Season tires

Overall, we stuck with the 245/40R18 size for a little width gain from the stock 235 size.  We've been really pleased with them so far!

Upgraded to Diode Dynamics SLF LED Fog Lights

The guys at Diode Dynamics are awesome - not only do they have great products, they stand behind them!  We recently had one of our older LED bulbs die out, so we did an RMA and since they no longer produced those lights, they sent us the latest SLF model LED - and wow are they great!


here's one of the new LEDs - excellent packaging and plugs right into the fog light socket!

Here's the simple removal/install process... I used to think you had to pull the bumper off these cars, but if you carefully use a flat screwdriver - it pops the fog light fascia off the bumper and all you need is a Torx-30 screwdriver to remove 3 screws!
 

Old LED on top, new setup on the bottom - very slick setup!
the trick to the front section coming off was to put a thin screwdriver in between the bumper and the fascia section for the foglight, you have to check a few locations but once you press down and pop the clips, pull toward the front of the car and it will pop out.

carefully popping off the fascia exposes the lens and 3 screws

3 simple screws and the lens comes right out 

just unplug the old bulb, and add the new LED - and screw/snap it all back together

Light output is excellent and now we have fogs again!  Highly recommended! 


Replacing the D3S HID bulbs in the Ford Focus ST

One of our ST's headlights went out last week, huge difference in light output when one of your HIDs goes out...  So I was on the hunt for a good D3S (the size) replacement...

The stock HID ballast in the ST3 are Osram 35W, so that's already good (as compared to older 25W versions)  There are the usual HID replacement parts, and boy can they be expensive!

One of the top rated bulbs is the OSRAM XENARC Night Breaker Laser D3S rated at 4600K


But holy smokes, $170+ for a pair of bulbs!  Surely there must be something better!  I was determined to find a GOOD set of HID for cheaper, and has great light output!


If you know the HID Kelvin color chart, 4.6K from the Osram is a decent HID coloring (as shown below) to see well, if you go too low you're yellow (good for fog lights), and if you go too high - well, you turn into ricer purple, heck I've even seen some guys go to 30,000K and it's HULK green!


Here's the replacement process I used... took me about 20 minutes to do both sides:
    

only 2 screws need to be removed, arrows below


once the screws are out, gently rock the headlight around - you'll know when it comes free - just don't forget to pull the plug that connects to the light - there's a small clip underneath, the tab slides away from the headlight and the clip should pull right out - on the bottom of the headlight you'll see the HID igniter (note the 35W)


pull the rubber cover off the back of the headlight where the HID is located, pretty easy two little tabs available - just give them a tug...  then you'll see the internals where the bulb is connected


I used a flat screwdriver to gently pop off the plug - note the orientation of the bulb
To remove the bulb, there's a twist-lock tab between the bulb and the headlight socket - twist it counter-clockwise (only about a 1/2 in. is all that's needed) and the bulb comes out EASILY.

Here's the OEM HID bulb with the twist-lock collar attached, has a blue igniter - it's an OSRAM XENARC D3S HID Xenon Headlight bulb 66340 - 4.3K color - actually a pretty nice OEM bulb!  About $48/side.


NOTE: DO NOT TOUCH THE NEW BULB WITH YOUR HANDS, USE GLOVES!

You have to remove that black twist-lock connector - it's just pressure fit and slides off with a little wiggling.  Note the orientation of the collar as it can fit on the new bulb in a few different angles.  If you can see in the photo above, the open left side of the collar aligns with the plug on the HID bulb.

Below, you can seee the new RCP D3S6 D3S/ D3R 6000K Xenon HID Replacement Bulb has a white ignitor and I've attached the collar.

 
Here's the new bulb installed - just reverse the process and you're done!

Definitely a whiter light than OEM (6K vs 4.3K)


I'll have to do some night pics but so far these lights have not dissapointed at all for only $13 per bulb!  Enjoy!


mounted the DVC Kicker (finally)

I finally got a free afternoon to put the Kicker sub back into the car - it's been so 'empty' without this low-end sound...  but ran out of time, still need to run the power wire to the amp!


Focus ST T-Shirts n-stuff

I've started designing some shirts and stuff for the ST crew - simple design, based on the newer body style '15-up What do you think?


https://www.redbubble.com/people/Toadster88/portfolio

Michelin Pilot Sport 4S are Installed

Finally got the appointment to have the Michelin Pilot Sport 4S tires installed - a little wider than stock by 10mm, and 1/2 aspect ratio smaller (40 vs 45) - which doesn't affect the speedometer, etc...


The techs at America's Tire loved the ST and said I would absolutely love the Sport 4S tires - they're super high rated, and knowingly so since they're the successor to the insanely popular Michelin Pilot Super Sport tires...

OEM size of the Goodyear Eagle F1s are 235/45R18 which are a bargain compared to the Michelin rubber, to be honest, less than 1/2 the price!!

 
 Just check the specs!   👀


We will see about how long these tires last :)  LOL

I'm sure they'll take a few miles to break in as the outer skin wears through - but I'm very impressed with the noise on the road and they feel VERY plush for an aspect ratio of 40!

Even though pricey - I give them 👍👍


Ordered a set of Michelin Pilot Sport 4S - install pending

Our ST has chewed up the OEM tires, took only 23k miles... but what do you expect from a little rocket that you throw around corners.  I'm surprised they lasted this long!  😆

I've had the Michelin Pilot Super Sport (PSS) on my AMG E55 and even on our 2011 Mazda MX-5 - the handling and grip is amazing!  So I looked for those as a replacement - and found them for $149/ea at America's Tire - alas they're an older set of PSS that they're discounting due to age, and they're being phased out...

So we ordered a new set of Michelin Pilot Sport 4 S which is the successor to the ever popular PSS.

We had to go up 10mm in width to fit the Focus @ 245/40R18 (OEM is 235/40R18)
Install is pending this week... feedback to come!


*UNOFFICIAL* SYNC 3 Version 3 update BUILD 17276 is OUT

If you liked my last thread on Ford SYNC 3 Version 3.0 - this is even better!  A new build!

Mirror: Here

Non-Nav Version 
Mirror: Here 

(Follow official pdf instructions below) Installation instructions: 
1. Download. 
2. Unzip onto desktop. 
3. Grab a USB Flash Drive, 32GB minimum

4. Format the drive to exFAT.

5. Put the extracted files inside the flash drive. 
6. Turn car on. Turn bluetooth off, just in case(optional). Or master reset before beginning.
7. It might take 5 mins for Updating System Software message to pop up, then 19 mins to install from there on

Depending on the Ford model, it might reboot automatically after installation is complete, if navigation maps don't come back don't worry turn off/on the car again.

*OFFICIAL UPDATE v2.3.10 --> OWNER.FORD.COM*

**CAUTION:There are FOUR versions to this update, MY 16 Nav/Non-Nav, and MY 17 Nav/Non-Nav, a single file will not work for both years! Even if they appear identical, use the one for your model year! You risk damaging APIM and/or Gracenotes and possibly other things**

***FOR INSTALLATION TO GO FLAWLESSLY THE FIRST TIME, USE MIN. 32GB USB DRIVE WITH 3.0 SPEED FOR BEST RESULTS.***


Mirror links:North America: (Follow pdf attachments at the bottom for instructions)
Official link to MY 16 w/Nav: HereOfficial link to MY 17 w/Nav: Here

USB Step 1 PDF
USB Step 2 PDF
USB Step 3 PDF

USB Upgrade to SYNC3 Version 3.0

Well, if you're like me - you love the Ford Sync 3 interface - while it's not perfect, it's pretty darned good!  Carplay is a nice update but if you've updated to IOS 11 - you'll notice some weird things going on - but guess what!? If you don't want to wait for the WiFi update - you can install SYNC 3 Version 3.0 using a USB drive!


There are new features for CarPlay with 
  1. New Nav Icon. 
  2. Fixed keyboard
  3. added symbol $
  4. MUCH faster interface smoother, snappier
  5. Support for new apps

**disclaimer - do this at your own risk! not my fault if it goes belly up!**


Installation instructions: 1. Download. 2. Unzip. 3. Grab a USB Flash Drive, 4GB is fine. 4. Format the drive to either exFAT or FAT32. 5. Put the extracted files inside the flash drive. 6. Turn car on. 7. Plug in car and enjoy!!


***** Note that depending on your USB device it might take up to 10 minutes for the stereo to show "Updating System"... *****

The USB in the car is NOT USB 3 therefore read speed is limited, so if you don't see anything, DO NOT unplug - just wait.... 


There are two versions to update your particular SYNC 3 system

Navigation 
Non-Navigation


found this over at http://www.mustang6g.com/forums/showthread.php?t=90236&fref=gc&dti=935473876561093

Focus STaRS american flag vinyl - looks great!

I saw the Focus STaRS (get it?) American Flag Quarter Window Decals and thought, dang that would look awesome on the ST!  I was right! 👍👍


They are a larger sheet so you'll have to lay it out on the glass, trim the edges, then place the vinyl and trim as needed - took me about 5 minutes per side... very nice quality and subtle patriotism!

Goes great with the Magnetic Metallic paint!

Boomba short shifter installed!

Finally after about 6 months I got some time today to install the Boomba short Shifter with Shift Plate


I'll be honest, it took me about 5 hours to install everything...


Position        % of OEM Reduction
 Adapter plate
1 80%   20%
2 70%   30%
   
Shift lever
 1 90%        10%
 2 80%   20%
 3 70%   30%
   
Combination
1 & 1 72%   28%
 1 & 2 64%   36%
 1 & 3 56%   44%
 2 & 1 63%   37%
 2 & 2 56%   44%
 2 & 3 49%   51%

I went moderate - which is PLENTY at 36% reduction in shorter shifts, it feels amazing!  The bushings make the shifter feel like it's a slotted shift-gate, seriously amazing feel - no wobble, just BAM into gear... LOVE IT!

Here are some pics of the install :)

 The dash and shifter tunnel all torn apart - EEK!
Aluminum bushings installed on the shifter too!  All finished!  Nice lower stance, and the shifts go CLICK-SNICK!  :)